Now that we have installed scala development environment lets jump in to basic code and look at how we can execute Scala code. We will see 3 different way of executing scala code.
Scala interpreter
Using Scala interpreter we can test our single line code very easily. To get the Scala Interactive Interpreter open the terminal and type “Scala”, it will change to command line scala interpreter mode. Once the command line interpreter is ready copy paste the following code and press enter. In the belwo code we can see an example of comments. Just like in Java and C# single line comments begin with two forward slashes (//). Comments that span several line begins with /* and ends with */.
// Single line Comments
/* Multiline Comments*/
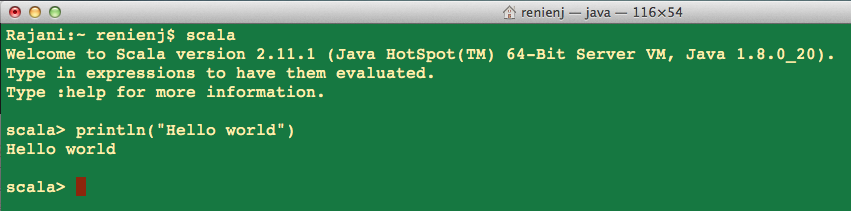
println("Hello world")The Figure 1 shows the result. It’s simple, now lets check how we can execute the scala scripts.
Scala Script
We can execute the Scala code inside a text file which ends with “.scala” and can execute in command line by typing “scala filename”. For instance lets create a scala file which contains “println(Hello World”)” (Figure 2).
echo “println(\”Hello World!\”)” > hello-wolrd.scala
scala hello-wolrd.scala
Compile and Run
If we need to compile and run the code, the code need to be in the context of an application so lets create an object with a main method, which prints “Hello World”.
object Hello {
  def main(args: Array[String]) {
    println("Hello, world 1")
  }
}

object Hello {
  def main(args: Array[String]) = println("Hello world 2")
}

object Hello {
  def main(args: Array[String]) : Unit = println("Hello world 3")
}
Not like in Java / C# Scala code can be written in many ways but the result will be same. Hence, this makes Scala very unique and helps to get our results with only few lines of code. We have only so far discussed basic code but when we cover the rest of blog series you will surely experience the beauty of scala ☺.
After creating your Scala script to compile use “scalac filename.scala” and to run the class file use “scala filename.class”.
Scala and Editor
I will show you how to build Scala on Intellij IDEA. In our previous blog post we talked about installing scala plugin and hope you installed it successfully. Scala supports Maven and Simple Build Tool (SBT) as building tools for a project. Since SBT is new, we will see how we can easily setup Scala projects using SBT.
If you want to install SBT binaries in you machine follow through their guide and you will be able to easily install it. Once you install it you will be able to build your code or project through terminal.
If you install the scala plugin to Intellij IDEA, the IDE will automatically identify the SBT project and will generate all the needed Scala project files. Simply create an empty folder called “hello-sbt” and create a file call “build.sbt”. Now include the following sbt script inside “build.sbt” file.
name := "hello"
version := "1.0"
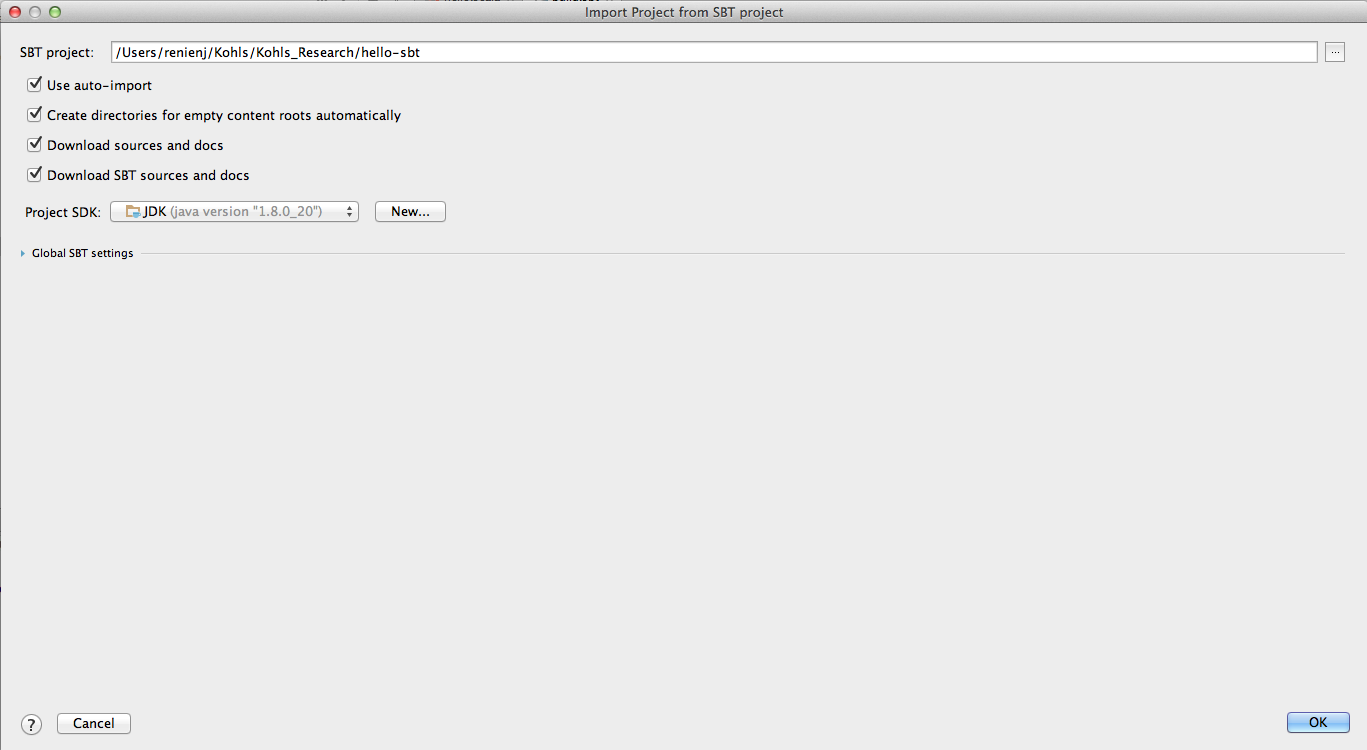
scalaVersion := "2.10.4"That’s it, now open the folder(“hello-sbt”) using Intellij IDEA it will automatically identify SBT file and will prompt a message to automatically import all the need files and the scala libraries (Figure 3).
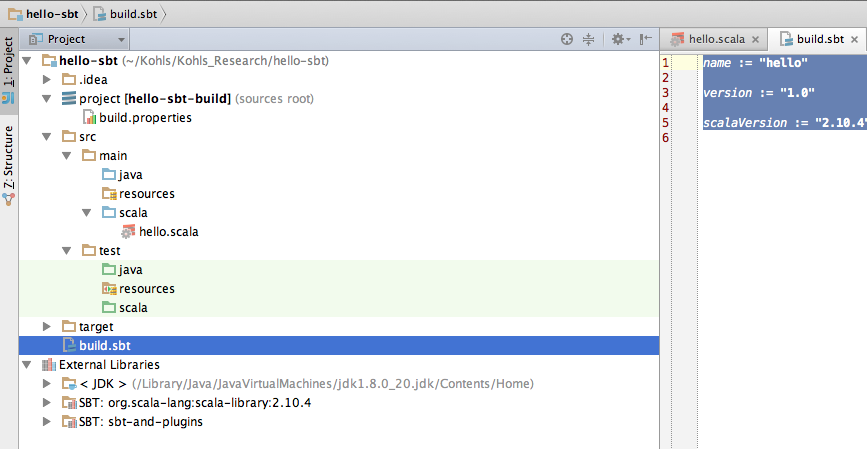
Intellij IDEA will automatically setup everything and SBT will download the scala. After the setup is completed the project structure will look as Figure 4.
Now you have successfully create a scala project using the IDE. We have so far covered only setting up the development environment and to run scala code. Its time code now ☺.